Hiking Angels Landing stands as a pinnacle experience for adventurers seeking a thrilling and awe-inspiring journey within Zion National Park. Renowned as one of the most popular hikes in the United States, if not the world, the trail to Angels Landing captivates hikers with its breathtaking scenery and challenging terrain. The allure of this iconic hike lies in its dramatic ascent to a lofty summit that unveils panoramic views of the surrounding red rock canyons.
The trail is renowned for its narrow ridges, steep ascents, and breathtaking vistas, making it an exhilarating undertaking for those seeking an unforgettable adventure in the heart of Utah’s stunning landscape. Hiking Angels Landing has become a bucket-list item for outdoor enthusiasts, drawing visitors from across the globe to experience the unique combination of natural beauty and thrilling exploration.
Angels Landing Hike Overview
- Location: Zion National Park
- Overall Rating: Difficult
- Total Trail Distance: 4 miles out and back
- Elevation Gain: 1,600 ft
- Time: 4 hours
- Cost: Park Entrance Fee
Frequently Asked Questions about Hiking Angels Landing
- How difficult is the Angels Landing hike? The Angels Landing hike is considered strenuous. It involves steep and narrow sections with sheer drop-offs. Hikers should be in good physical condition and not have a fear of heights.
- How long does it take to hike Angels Landing? The round-trip hike typically takes around 4 to 5 hours. This can vary depending on your fitness level and the time spent at the summit enjoying the views.
- Is a permit required to hike Angels Landing? Yes, there is now a lottery to get a permit to hike Angels Landing.
- What is the best time to hike Angels Landing? Early morning is often recommended to avoid the heat and crowds. Additionally, the sunrise views from Angels Landing are spectacular.
- Are there any safety precautions to be aware of? Yes, it’s essential to stay on designated trails, use the chains provided in steep sections, and be cautious of weather conditions. The trail can be dangerous, and hikers should be aware of their surroundings.
- Can I bring my dog on the Angels Landing hike? No, pets are not allowed on the Angels Landing trail to ensure the safety of both visitors and wildlife.
- Are there restrooms along the trail? There are restrooms at the Grotto trailhead, but there are no facilities along the Angels Landing trail itself. It’s advisable to use the restroom before starting the hike.
- What should I bring for the hike? Be sure to bring plenty of water, snacks, sunscreen, and wear sturdy hiking shoes. It’s also advisable to carry a small backpack for essentials.
- Is Angels Landing suitable for beginners? The hike is challenging, and beginners should be aware of the difficulty level. It’s recommended for experienced hikers or those comfortable with strenuous trails.
- Can I hike Angels Landing in the winter? Winter conditions can make the trail icy and dangerous. It’s important to check weather conditions and trail status before attempting the hike in winter.
The trail for Angels Landing
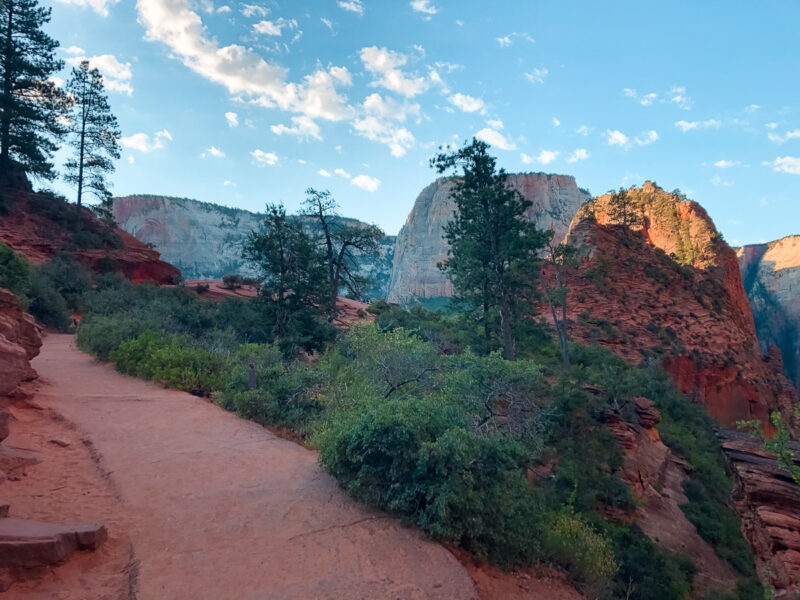
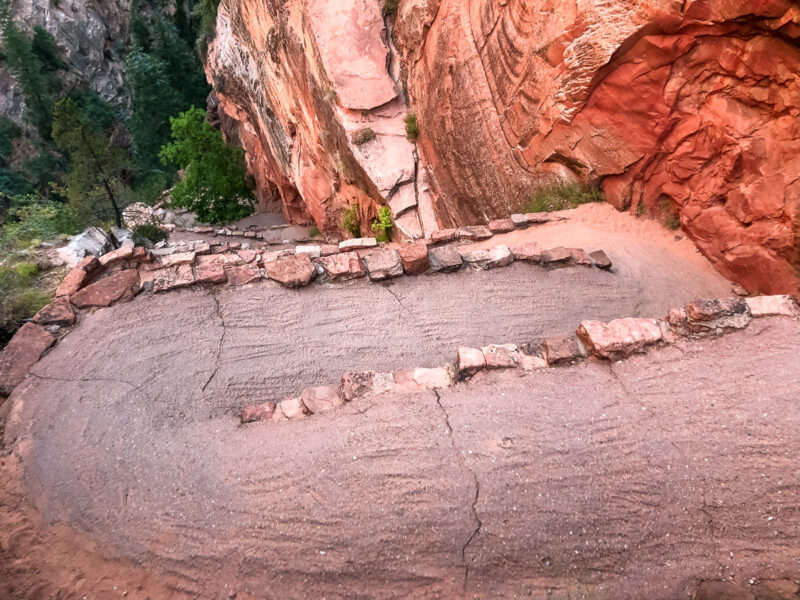
About 75% of the trail is going to be switchbacks. You will start on a trail that will be more soft dirt/gravel. Then as you start reaching the mountains it will switch to steep concrete roads – however, the switchbacks grade gets steeper.
That will be a majority of the hike, walking uphill and turning back and forth. There is a break in the middle where you will walk through a small valley like opening to get to the backside of the main peak. Then it is back to the switchbacks.
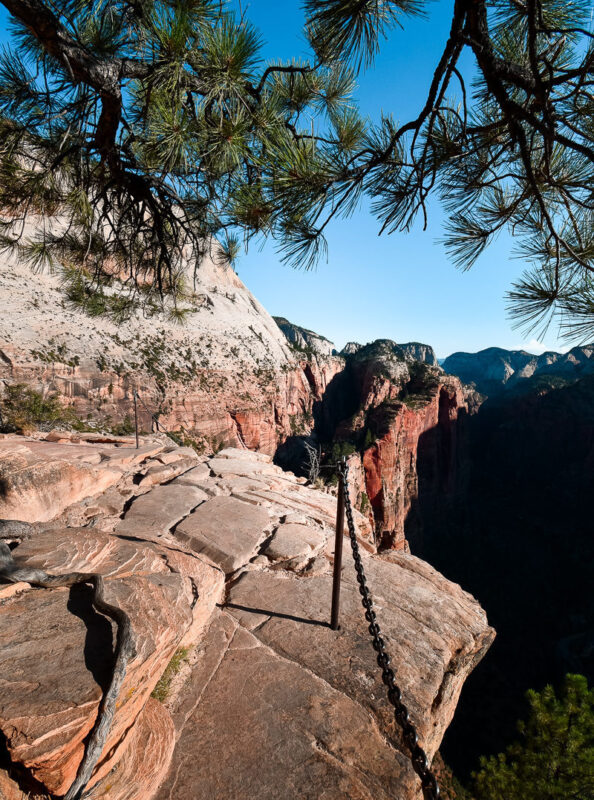
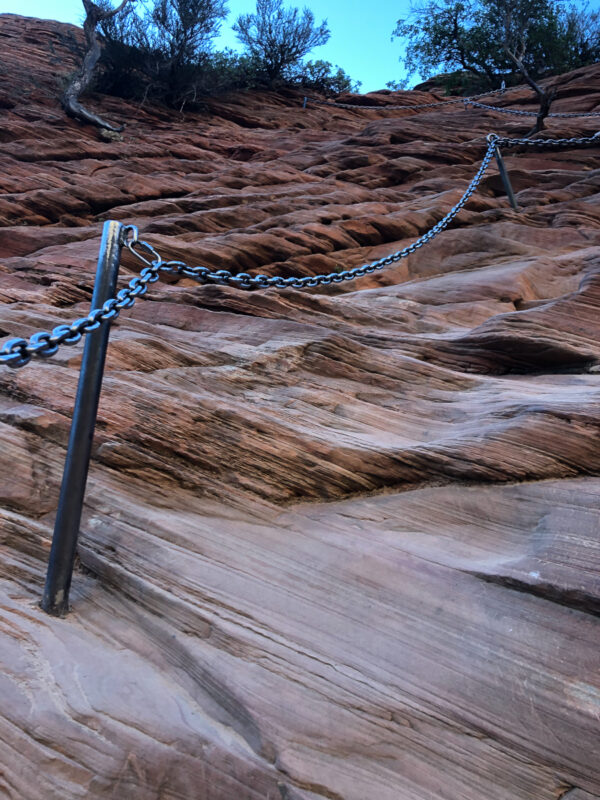
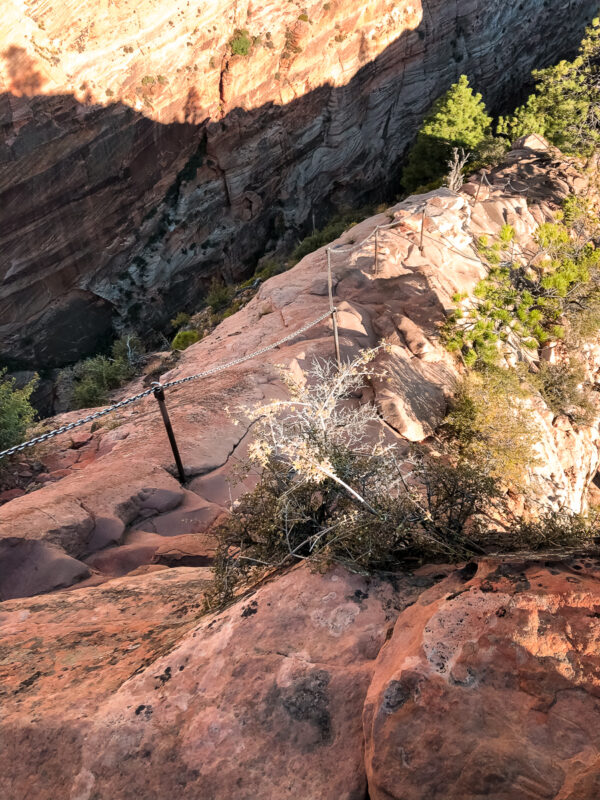
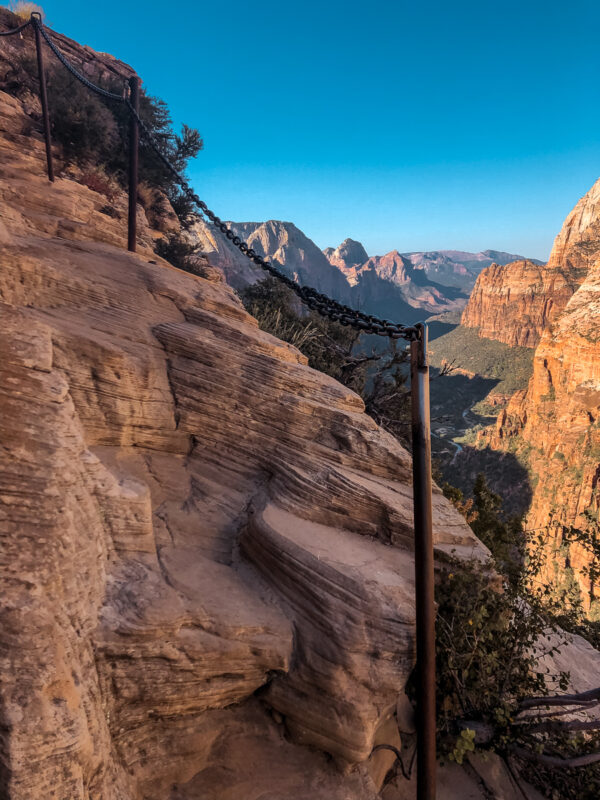
The part that Angels Landing is most famous for is the last 25% of the trail: the climbing over the rocky tops using chains as handrails.
The photos do the height justice – you are very high up. However, I will say that there is still plenty of width on the trail that you still feel very secure climbing up.
The trail does get a bit narrow in some areas near the top – making it difficult to pass hikers going in the opposite direction – this is what takes the longest, in the end, is the constant “traffic jams”.
Best Time to Visit Angels Landing
Important Update: Permits and Allocated Time Slots for Angels Landing Hike
Recent changes in Zion National Park regulations now require permits for hiking Angels Landing. With this new system, hikers will be allocated specific time slots to ensure a more controlled and safe experience on the trail.
Hikers will need to obtain a permit for their chosen time slot, and three distinct periods have been established:
- Before 9 AM: Early morning slots are available for those who prefer to start their hike in the cooler part of the day and enjoy the serenity of the trail before it gets crowded.
- Between 9 AM and 12 PM: Mid-morning slots are allocated for hikers who prefer a later start but still want to experience the trail during the morning hours.
- After 12 PM: Afternoon slots are designated for those who plan to start their hike later in the day. This allows for flexibility while managing the overall number of hikers on the trail.
It’s important to note that these time slots aim to enhance safety and preserve the natural environment of Angels Landing. Hikers are advised to obtain permits in advance and adhere to their allocated time to ensure a smooth and enjoyable experience.
Please check the official Zion National Park website or contact park authorities for the most up-to-date information regarding permits, time slots, and any additional guidelines for hiking Angels Landing.
Warnings and Dangers of Hiking Angel Landing
Hiking Angels Landing in Zion National Park is a thrilling adventure, but it comes with its own set of warnings and dangers. It’s crucial for hikers to be aware of these risks and take appropriate precautions. Here are some key warnings and dangers associated with the Angels Landing hike:
- Steep and Narrow Sections: Angels Landing features steep and narrow sections with sheer drop-offs on either side. Hikers must be prepared for challenging terrain that includes exposed cliffs and heights.
- Chain-Assisted Sections: To navigate the steeper portions of the trail, metal chains are provided as assistance. Hikers should use these chains for support, especially in areas where the trail narrows and becomes more precarious.
- Weather Conditions: Weather in Zion National Park can be unpredictable. Sudden rain can make the trail slippery, and lightning poses a significant danger on exposed sections. Check the weather forecast before starting the hike and be prepared for changing conditions.
- Heat and Dehydration: Summers in Zion can be hot, and the hike to Angels Landing is strenuous. Hikers should carry an ample water supply, wear appropriate sun protection, and be mindful of signs of dehydration.
- Crowded Trail: Angels Landing is a popular hike, especially during peak seasons. Crowds on the narrow sections can lead to congestion and potential delays. Exercise patience and caution when passing or allowing others to pass.
- Physical Fitness and Fear of Heights: The hike is physically demanding, and those with health issues or a fear of heights should carefully consider whether it’s suitable for them. The exposed cliffs and steep drop-offs can be unsettling for some individuals.
Views from the Top
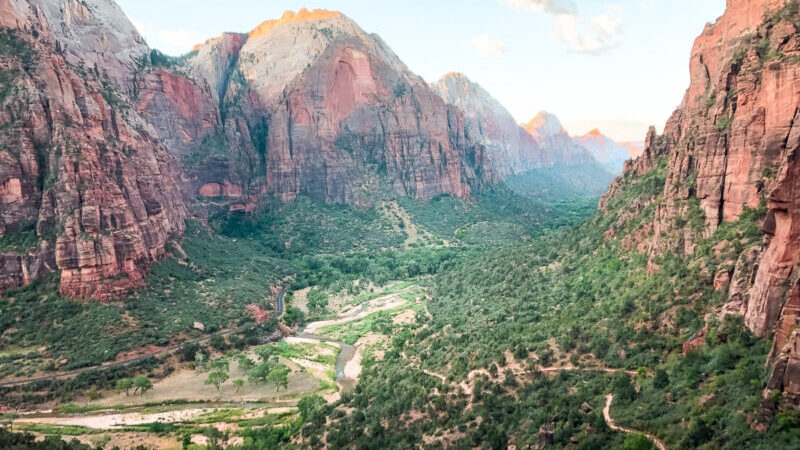
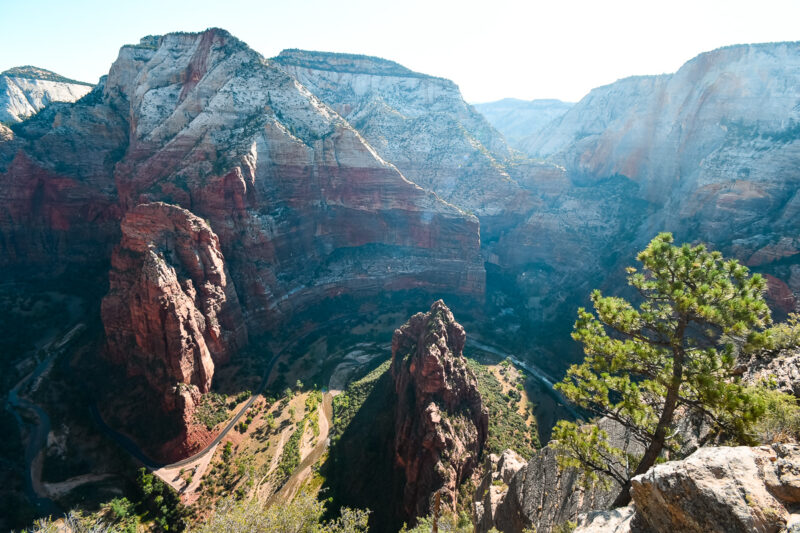
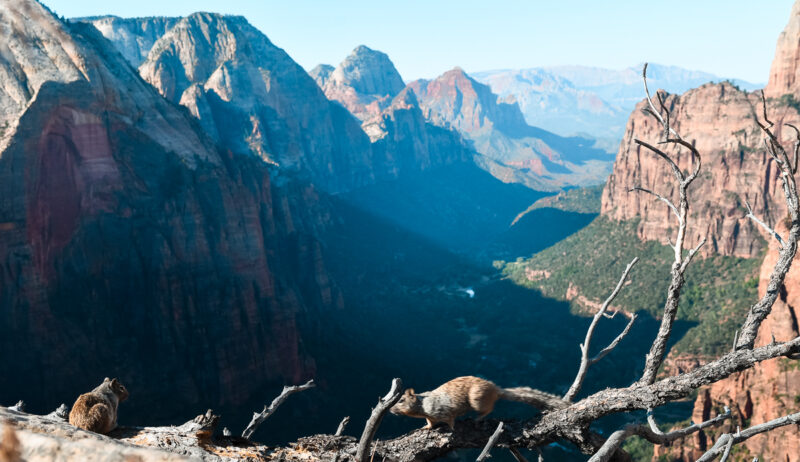
The views from the very top are almost 360. You will be able to see down the entire valley of Zion National Park, and then behind Angels Landing towards the u-bend river and towards the Narrows.
Due to the hard work of the climb, I recommend taking the time to enjoy the views from the top as long as possible. Sit up there, drink some water and have a little picnic. You will need to regain your energy for the hike back down (and potentially your patience as there will be more people on the trail and traffic jams).
The time it takes to Hike Angels Landing
The time for hiking Angels Landing will depend on your physical ability. The grade of the hike slows a lot of people down. Fear of heights slows even more people down at the last portion of the hike. However, I saw people complete the hike in about 1 hour and 30 minutes. I was generous in my estimate, giving about 3 hours. About an hour and a half to get up, then some time to enjoy the top before starting back down. The trail down is quick as the entire trail is downhill – so you can quickly descend in about 45 minutes with no breaks.
The total time to hike Angels Landing: 4 hours
Hiking Attire for Angels Landing
Choosing the right hiking attire for Angels Landing is crucial to ensure comfort, safety, and flexibility on the challenging trail. Here are recommendations for the type of hiking attire suitable for the Angels Landing hike:
- Hiking Boots: Opt for sturdy and supportive hiking boots with good traction. Choose boots that provide ankle support, as the trail includes uneven terrain and rocky sections.
- Moisture-Wicking Clothing: Wear moisture-wicking, breathable fabrics to keep sweat away from your skin and promote quick drying. Avoid cotton, as it retains moisture.
- Lightweight Pants/Convertible Pants: Choose lightweight, durable pants or convertible pants that can be transformed into shorts. This provides flexibility as temperatures may vary throughout the hike.
- Long-Sleeve Shirt: A long-sleeve shirt can provide sun protection for your arms. Look for lightweight, breathable materials.
- Sun Protection: Wear a wide-brimmed hat to shield your face from the sun. Apply sunscreen with high SPF to exposed skin, and consider lightweight, UV-blocking clothing for additional sun protection.
- Layers: Dress in layers to adapt to changing temperatures. A moisture-wicking base layer, insulating mid-layer, and a waterproof or windproof outer layer can be beneficial.
- Gloves: As certain sections of the trail involve chain-assisted climbs, consider wearing lightweight gloves to protect your hands and provide a better grip on the chains.
- Sunglasses: Protect your eyes from glare and UV rays by wearing sunglasses with good coverage.
- Hiking Socks: Choose moisture-wicking and comfortable hiking socks to prevent blisters. Consider a wool or synthetic blend for optimal moisture management.
- Backpack: Use a small backpack to carry essentials like water, snacks, a first aid kit, and extra layers.
- Headwear: In addition to a wide-brimmed hat, consider a bandana or buff to protect your neck from the sun.
- Rain Jacket: Pack a lightweight, packable rain jacket in case of unexpected rain or wind.
- Comfortable Undergarments: Choose moisture-wicking and comfortable undergarments to prevent chafing.
- Emergency Whistle: Attach an emergency whistle to your clothing for safety. It can be useful in case of emergencies or to alert others on the trail.
Packing List for Angels Landing
When preparing for a hike to Angels Landing in Zion National Park, it’s essential to pack thoughtfully to ensure a safe and enjoyable experience. Here’s a packing list to help you prepare for the Angels Landing hike:
- Hiking Boots: Sturdy, comfortable hiking boots with good traction are crucial for navigating the rocky and uneven terrain.
- Water: Carry an ample supply of water to stay hydrated, especially during warmer months. Consider a hydration system or water bottles.
- Snacks: Pack energy-boosting snacks such as trail mix, granola bars, or dried fruit to keep your energy levels up during the hike.
- Backpack: Use a small backpack to carry your essentials, including water, snacks, and any additional layers you may need.
- Sun Protection: Wear sunscreen with high SPF, a wide-brimmed hat, and sunglasses to protect yourself from the sun’s strong rays.
- Weather-Appropriate Clothing: Dress in layers, considering the weather. Lightweight, moisture-wicking clothing is ideal. Bring a jacket or rain shell if there’s a chance of rain.
- Navigation Tools: Carry a map of the trail and the park, and consider a GPS device or smartphone with a reliable navigation app.
- First Aid Kit: Have a basic first aid kit with bandages, pain relievers, blister treatment, and any personal medications you may need.
- Headlamp/Flashlight: If you plan to start early or if your hike extends into the late afternoon, bring a headlamp or flashlight for visibility.
- Camera/Phone: Capture the stunning views by bringing a camera or smartphone. Ensure your phone is fully charged and consider an external power bank.
- Permit and Identification: Carry your permit for the hike, and have a form of identification with you.
- Gloves: As the trail includes chain-assisted sections, lightweight gloves can provide extra grip and protect your hands.
- Emergency Whistle: Carry a whistle for emergencies. It can be useful for alerting others in case of an accident or if you need assistance.
- Trash Bag: Follow Leave No Trace principles by bringing a small trash bag to pack out any waste.
Facilities at Angels Landing
At the trailhead, there are powered bathrooms, and there are porter potties. There is a water spout to be able to fill any water prior to the start of the hike.
At the top of the trail before you start the potentially terrifying climb across the rocks – there is another bathroom.
So there is no concern about not be able to use the bathroom before or during the hike.
Parking at Angels Landing
There is no parking available at Angels Landing for visitors. Zion National Park has a shuttle bus in operation and the only way to reach any of the hiking destinations at the park is by this shuttle bus.
You will have to park your car either at the Visitor Center (if you get there early enough to get a spot) or in the town and then take a bus from the town into Zion National Park.





[…] Hiking Angels Landing at Zion National Park […]
[…] Angel’s Landing – one of the park’s most popular and daring hikes. Click here for a guide to hiking Angel’s Landing. Grand Teton NP: Classic view of the Teton Range […]
[…] 2: Zion National Park – Angels Landing and The Narrows […]